By Wes Ganobcik
In order to justify a field renovation to your organization, you must be able to show the costs associated with the existing deficiencies at your facility. Whether those are drainage problems, grading problems, field material problems, irrigation problems, etc., it is imperative that you document costs for tools and materials, as well as work hours that are a direct result of those issues.
Additionally, it is important to document loss of revenue due to event cancellations. You will then need to research the costs associated with making upgrades that you believe will help overcome those issues and cancellations. Once you have estimated costs on both sides of your proposal, you can then go to your organization as a well-informed sports field manager, and provide hard data in an effort to justify your proposed renovations and improvements.
Once you have gotten approval for a renovation, it is extremely important to write very tight specifications and preset conditions into the proposal before going to bid or hiring a contractor. Depending on your organization and whether or not you are a private entity or government controlled, these details can vary widely. Regardless, it is important that you specify in great detail the exact materials you want used, the methods you want taken, the overall design (in conjunction with an architect), and experience requirements for the contractor.
Beyond that, put in the extra effort to stretch every dollar as far you can. Use existing relationships and work to create new ones that can be symbiotic or mutually beneficial throughout the process. During our renovation, we took advantage of a great relationship with the City of Columbus Recreation and Parks Department. They were able to use the milled-off turf and organic layer for compost and topdressing on their native soil fields, and were able to recycle our infield material for use on several of their fields. This saved us tens of thousands of dollars in disposal fees, and they were able to acquire hundreds of tons of materials at no cost.
When you are designing your field, make sure you work in conjunction with an (landscape) architect who listens to your concerns, understands the exact changes you want to make, and helps create a plan specific to your facility, rather than simply transferring a cookie-cutter design that may or may not have worked at countless other facilities. Make sure to do your homework before hiring an architect; ask for references, and use them. Call previous clients of that architect and don’t be afraid to ask tough questions about their results and the pros and cons related to that firm.
Additionally, if you feel overwhelmed or simply don’t have the time or background education to put this entire plan together, you may want to hire a qualified consultant to help guide you in the right direction and essentially act as your (organization’s) “agent” through the design and construction process. A good consultant can help with everything from quality control testing to detailed design ideas.
When preparing for a renovation, you must also get a firm understanding of logistics. Are there height, width or weight restrictions for equipment while accessing your field or facility? Is there more than one access point? Do you have any paved or open area on the property where materials can be stockpiled during removal or install?

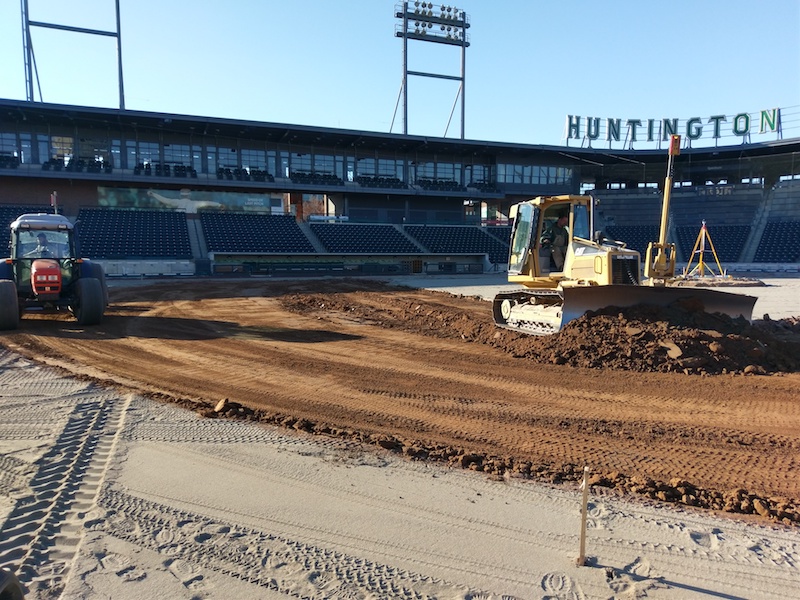
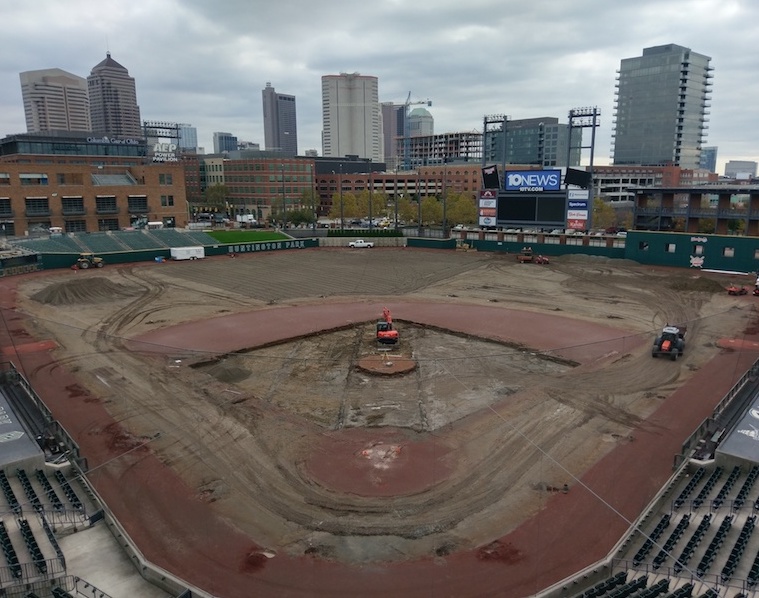
With our renovation, there was a separation between fixing the major issues and adding desired characteristics. Each of those would need to fit within the budget – some ultimately being put off until future projects. The two biggest problems from the original build were grading and drainage issues.
Our original build had the infield set up extremely high as a plateau, and then fell off steeply all the way around. There was nearly a foot of fall between the base paths and the dugouts, and there was also a steep grade off the back arc. This created a wide variety of maintenance challenges, as well as being awkward and sometimes unsafe for players. Additionally, the grade of the warning track fell from the wall to the grass, using the field as the active drain for not only all rainwater from the field, but also the majority of rainwater from the concourse that runs under the field gates and onto the playing surface. This caused major drainage issues, eventually resulting in the loss of games each season.
To address the surface grade, I first had to figure out exactly what we had. Our benchmark – the elevation point which could not change and where all measurements were based – would be the edge of our concrete shop floor adjacent to the field. The shop floor could not be raised due to costs, but especially because changing its elevation would eliminate access for tractor-trailers and large cranes, which regularly require access to the field for concerts and construction projects. Dropping the elevation was impossible due to a city sewer line that runs beneath the field just outside our shop door.
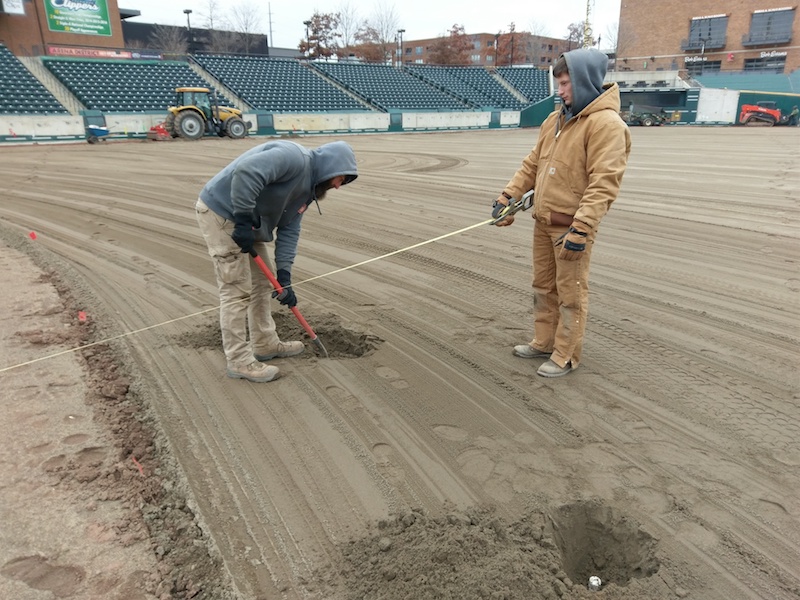
Next, I had to determine exactly how deep and what the elevation was for the drain tile, subgrade, pea gravel, and rootzone. While I had access to original as-builts, I didn’t trust them, and took a wide variety of measurements myself. Small holes were dug throughout the field, and measurements were taken to document the depth and elevation of each layer down to the subgrade.
Once I had created an accurate representation of what currently existed and what could not change, it was time to determine what I wanted – and then figure out what was actually possible, both physically and financially. One of the very first characteristics that I became determined to accomplish was a pure conical grade. That means that from whichever point you choose as the center of your cone (the center of the mound for us), the grade falls exactly the same in every direction to create a perfect cone. Most fields are actually not constructed this way, but my reasoning was for extremely easy laser grading of the infield dirt and warning track in the future. With a conical grade, a conical laser can be set at that center point and all parts of the field can be graded using that single measurement with no break points or adjustments. Additionally, I wanted our warning track to carry that pure conical grade downhill from the grass to the base of the wall all the way around the field.
The next step was determining a grade. My goal was to create a grade of somewhere between 0.20-0.25 percent. For those of you who don’t understand how grade is determined, a 1.0-percent grade means that there is 1 foot of fall over the course of 100 feet of run. A 0.50-percent grade would be 6 inches of fall over 100 feet. A 0.25-percent grade would be 3 inches of fall over 100 feet.
I calculated where the new elevations would be with a 0.25-percent grade compared to our existing surface grade. For all calculations, I used a measurement of 270 feet from the center of the mound to the center of the doorway at our shop floor. Being that I wanted a 0.25-percent grade, that meant I had to multiply 3 inchesx 2.7 to find that the base of the center of the mound would be 8.1 inches higher in elevation than the edge of our concrete shop floor. In theory, that was perfect. In reality, it was impossible. That’s because the existing elevation at the base of the center of the mound was slightly over 23 inches above the benchmark. It was both physically (because of the sewer line beneath our drainage system) and economically impossible to drop the elevation of the infield by 15 inches. If I wanted to keep my hopes for a pure conical grade, it was time to sacrifice my desire for a 0.25-percent grade and start getting creative. I created a spreadsheet that showed the elevations associated with an incredibly wide variety of grade options between 0.25 percent (8.1 inches) and 0.5 percent (16.2 inches) because I refused to go steeper than a half percent.
From there, I began to reference my other research on our existing field. I had found that across the infield grass, we had on average slightly less than 13 inches of rootzone. After speaking with some incredibly smart individuals, I determined that a minimum of 10 inches of rootzone would be acceptable. So that brought the 23 inches down to 20 inches, leaving less than a 4-inch gap to a potential 0.5-percent grade.
I quickly became open to manipulating the right field corner where our shop entrance is located, and I eventually came to grips with the concept of having a small triangle of area in the right field corner warning track fall at a greater percent than the pure conical grade. So I recalculated using our benchmark +2 inches. This brought us to within 2 inches of the 0.5-percent grade that I was using as a hard cap.
To make up those final few inches of elevation, I began checking more depths all the way around the edges of the infield (back arc and base paths). Because the infield sat up on a plateau and fell off so steeply all the way around, it was determined that we could drop the elevation by approximately 3 inches of rootzone and still provide us with a minimum of 10 inches.
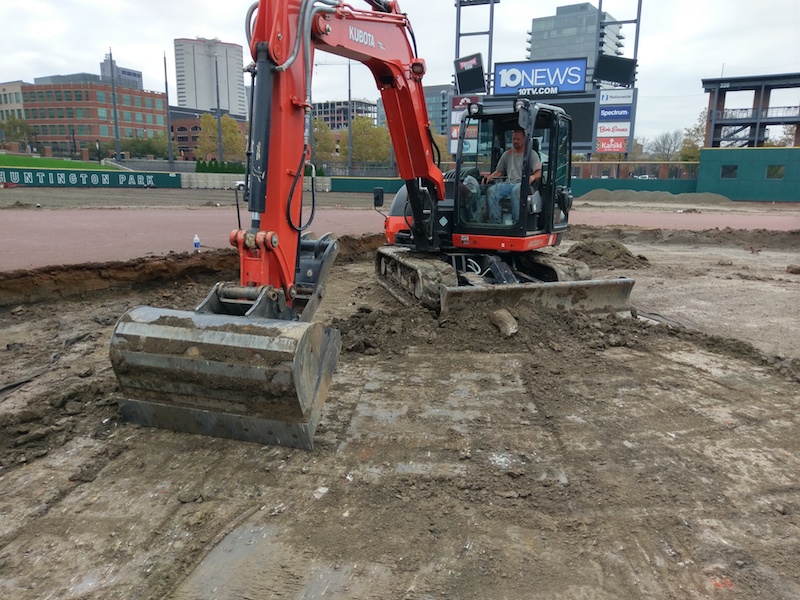
While this complicated the project and would certainly add time and cost, I now had a grading and elevation plan to propose to contractors. We would go with a 0.45-percent pure conical surface grade, or a fall of 5.4 inches over every 100 feet. From our concrete benchmark to the center of the mound, that would be a rise of 14.58 inches (5.4 inches x 2.7). The original elevation of 23 inches minus the 3 inches of rootzone brought us down to 20 inches. We raised the benchmark point by 2 inches, which brought us to 18 inches. If we then subtract the 14.58 inches of new grade, it leaves us with 3.42 inches to make up. With that original plateau design, we ultimately determined that we would completely remove the rootzone of the infield (and stockpile it in the outfield for re-use), remove and dispose of the pea gravel layer, then excavate out approximately 3.5 inches of subgrade beneath the infield to make up that 3.42 inches. Fortunately, the drain tile had been trenched very deeply into the subgrade, so removing 3.5 inches above it had zero impact on any drain tile.
If I had pushed to flatten the grade any more than 0.45 inches, it would have required that same type of excavation in a much larger area around the back arc and through foul territory, which would have added a significant amount of time and cost to the project.
While it was inconsistent and fluctuated in areas, our original outfield grade was in the neighborhood of 0.50 percent, which meant that in most places, it wouldn’t be modified by more than a few inches by changing to the new 0.45-percent grade, keeping costs out there relatively manageable. That wasn’t the case in foul territory, particularly from dugout to dugout and behind home plate. Because the original design had such a steep grade in foul territory, we would need to raise the elevation of the warning track in much of foul territory by as much as 6 inches to fit the new pure conical grade. This also required adding another concrete step to each of the six dugout entrance points. If you piece that all together, you’ll realize that we raised the elevation of the track by 6 inches while lowering the elevation of the infield by 6 inches. Because of that, the end result was noticeably different from the old field.
Once the final pure conical surface grade and elevations were determined, it was then time to determine how to remove surface water. The original design had a 4-inch vertical line come to the surface at every single point around the warning track where a lateral line met the perimeter line. Because the track was originally designed to run toward the grass and those drains, every time they were opened in rain situations, they would fill with warning track material. Prior to the beginning of the renovation, we tested and cleaned out the entire existing drainage system in-house. As part of the renovation, each of those vertical drains were capped and buried. Each was marked with GPS, as well as having a large piece of metal buried with it. This way, any of them can easily be found by using either GPS locating devices or a metal detector. The same thing was done with eight tarp drains around the perimeter of the back arc. This eliminated a huge amount of points that needed to be avoided while aerifying the turf in the future.
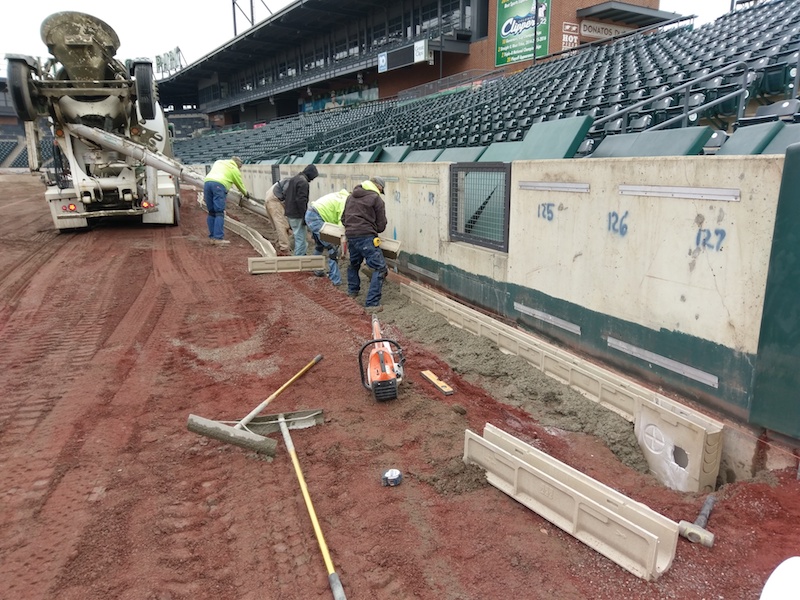
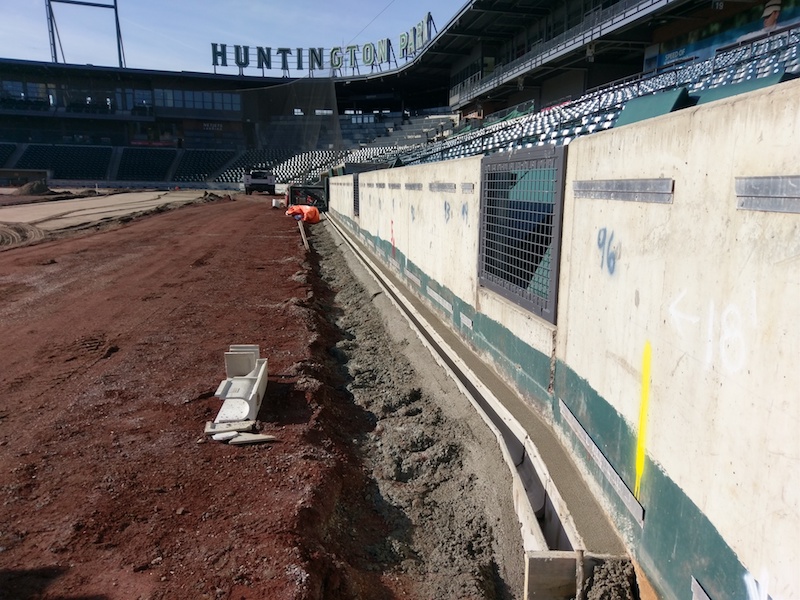
After much research and visiting many facilities, it was determined that we would install a 4-inch trench drain at the base of the wall in strategic locations around the warning track. Again, because of the pure conical grade, all surface water would run from the center of the mound downhill in every direction to the base of the wall around the entire perimeter of the field. For ease of maintenance and cleaning, the drains were set 4 inches off the wall and encased in concrete. I was highly impressed by the +/- 0.25-inch accuracy of installation in reference to the 0.45-percent conical grade. It was ultimately decided to install 420 linear feet of the trench drain in foul territory, split into five sections. An additional 140 linear feet was installed in seven 20-foot sections around the outfield. At the lowest end of each of those 12 sections was installed a catch basin and a junction where it was tied into the existing perimeter drain.
The vast majority of that trench drain was installed in foul territory for multiple reasons. During in-game rain events, the 170-foot by 170-foot tarp creates an incredible amount of surface runoff in those areas. Additionally, there are many points in which the rain accumulated on the concourse drains onto the field around foul territory. In the outfield, the turf and rootzone drains the vast majority of water, requiring very little surface drainage. Also, the seating bowl does not access the field at any point around the outfield, meaning that we have no concourse drainage to account for.
When deciding on the 4-inch trench drain, a stainless-steel surface grate with 1/8-inch holes was chosen. This would be safe for players, as cleats could not get caught in the holes. Additionally, the holes are small enough to prevent a significant amount of warning track material, sunflower seeds, peanut shells, and other debris from getting into the drains and reaching the catch basins.
Two years later, I would recommend this exact trench drain system to anyone. The only change I would make would be to install and marry a sister perimeter drain around the field right next to the existing perimeter line and tie the entirety of the trench drain system into that isolated line.
During construction in the turf areas, 2 to 3 inches of sod layer and organic layer were removed by milling off. As previously noted, hundreds of tons of that material was given to an entity that composted it and eventually used it as a topdressing. The remaining rootzone was then tilled a minimum of two directions, then laser graded to a depth of exactly 4 inches below the new 0.45-percent conical grade. Throughout the process, tests were taken and analyzed at the lab to determine exactly what we had and exactly what we should add to it. It was ultimately decided to add a 3.5-inch cap (approximately 1,450 tons) of straight USGA sand (from the same source the provided the original rootzone). Once that cap was added and laser graded evenly across the entire field, the new USGA sand was then tilled into the existing rootzone, again a minimum of two directions. It was then laser graded to -0.5 inch of the new 0.45-percent conical grade. Prior to sod going down, more tests were taken and analyzed at the lab. The final results showed that at least the top 8 inches of our new rootzone was comprised of 96-percent sand including 1.1-percent organic material, with the remaining 4 percent being silt and clay. That raised our sand content by approximately 3 percent from original construction (93 percent) and removed the thick organic layer created (presumably) by using well water for irrigation. Vertical drainage has been improved significantly. We have noticed in the two years since the renovation that areas where the rootzone is thinner (approximately 10 inches), it dries out more quickly than areas deeper in the outfield and foul territory where the rootzone can get as deep as 15 inches. This makes sense as there is moredense rootzone sand for the water to drain through before reaching the gravel layer below in deeper areas.
In a very last minute decision, I elected to essentially chop off the top of the cone and make the infield flat. In a 45-foot radius circle from the center of the mound, we made the surface grade of the rootzone perfectly flat. This makes nearly all of the grass inside the infield dirt and base paths completely flat. All the way around that 45-foot radius circle, the surface picks up that 0.45-percent grade and is completely unnoticeable to the naked eye.
While my heart was initially set on the 0.20- to 0.25-percent grade, I couldn’t be happier with the 0.45-percent grade that we ultimately wound up with. It creates just enough surface runoff to help with the extremely heavy rains, but is flat enough to allow for even vertical drainage and holding of nutrients most of the time. From a playability standpoint, it acts as though it’s completely flat and the players absolutely love it.
To fill that top 0.5 inch, we asked the sod farm to cut the sod as thin as they felt comfortable at the end of December. The sod was grown in New Jersey on a sandy loam soil and was a blend of four varieties of Kentucky bluegrass. Once the sod was laid, it was cleaned of stones and other debris. It was then rolled with our 1.5-ton roller, and topdressed with approximately 60 tons of sand. The following spring, the entire field was overseeded with 200 pounds of three varieties of Kentucky bluegrass (Hampton, Bewitched, and Noble). Those are the three varieties that we continually overseed with as needed due to wear or disease. We use an extremely small amount of ryegrass in season, but that is never applied more than 4 feet off any dirt edge (shortstop position, second base position, umpire spots, in front of the mound, and walk up edges around the plate). This way, a single piece of big roll sod can completely eliminate all rye from the field and bring us back to 100 percent KBG. No rye is ever thrown down the foul lines or in outfield position areas.
After our infield material was removed down to the subgrade, it was laser graded and compacted to exactly 4 inches below the new conical surface grade. A new 4-inch cap of custom professional highly engineered infield material was then installed. A 3-inch cap may have been sufficient, but if we are ever to modify the infield, I want to be able to till the top 3 inches and have a 1-inch buffer to prevent contaminating with any debris from the subgrade below.
For the warning track, because we were changing elevations in many areas, we simply moved around the old warning track material to use as the base for the cap of new material. Similar to both the rootzone and infield areas, the warning track was laser graded to exactly 4 inches below the new conical surface grade. Because of the new trench drains, we were no longer looking for any vertical drainage down through the track, so the more compact we could make the base, the better. The new 4-inch cap was comprised of the same dyed lava rock, but with slightly different gradation. As the track ages, the lava continues to break down at the surface due to wear, creating a slightly tighter warning track. We keep the warning track saturated and occasionally rolled in an effort to keep it as firm as possible.
The overall irrigation design remained intact, as the layout worked well for us in the past. One change that was made was complete removal of the infield zone during the infield excavation, followed by a much more simplistic zone with four heads. The original infield zone had 20 total heads – four down each side, with an additional four around the mound. Not only was avoiding 20 heads while aerifying highly detrimental, those heads also created a cloud, per se, which often would soak a dirt edge when any wind was present.
We also have two dirt zones, one on the inside and one beyond the arc. Three total heads were eliminated during the renovation. Additionally, all heads and quick couplers along the back arc, as well as in several other locations, were moved 4 feet 6 inches off the dirt edge. Our aerifier is 48 inches wide, so this allows us to make a pass along edges without having to avoid irrigation heads.
As part of the new warning track installation, we chose to add four zones that cover the entire warning track. These heads are located just inside the trench drain at the base of the wall, and nozzles set to spray only the width of the warning track in that location. This saves us several hours of work for two to three employees most days. Regardless of any turf irrigation, we run the warning track irrigation every single night to the point of standing water to create full saturation and firmness in the warning track.
For all 12 quick couplers around the field, we eliminated the valve box that they were originally installed into and buried them directly into the turf, with the cap of the coupler at the surface. This creates a much smaller area to avoid with the aerifier. Additionally, we have found that the couplers remain much more stable in the ground, and are significantly less likely to snap when a crew member becomes overzealous and yanks a bit too hard on a hose.
There were plenty more considerations for our renovation than could be outlined here, as well as enough renovation wish-list items to fill another article, but the key takeaway from our project is to do your research, and document the costs and benefits of every aspect for presentation to your organization.
In our situation, I had enough experience and confidence to push forward with my own design. I researched every single aspect of our field from the subgrade to the surface and noted any discrepancies on the as-built drawings. I spent two years reaching out to colleagues around the world, at all levels, in all sports, as well as to trusted vendor representatives. I asked the same questions over and over again, to well over 100 individuals, to make sure I understood every possible option that existed, as well as the costs and benefits of each. Using that information, combined with the understanding of the very specific issues at our facility, I pushed forward and designed our new field.
Remember, outside of a consultant, nobody is going to fight for you and specific parts of the project once budget cuts and cost overruns come into play. It is incredibly important to stay involved the entire way through and to make sure that the renovation actually improves your facility and your maintenance approach.
Wes Ganobcik is head groundskeeper at Huntington Park, home of the Columbus Clippers professional baseball team, Triple-A affiliate of the Cleveland Indians.