Our thanks to Alec Kowalewski and Jim Sloan of Oregon State University for allowing us to publish portions of this university publication. It was written with the Pacific Northwest region in mind. To read it in its entirety free of charge, see https://catalog.extension.oregonstate.edu/pnw676/viewfile. A version in Spanish is currently being created.
Sand-based, natural turfgrass fields compared to synthetic surfaces are initially less expensive, more enjoyable to play on, cooler in warm weather, less hazardous when wet, have more resiliency and are 30 to 50 times less expensive to replace. However, high quality, sand-based sports fields able to withstand intensive traffic under a range of climatic conditions depend on many construction components, such as sand selection, base grade, surface and subsurface drainage, turfgrass genus and species selection. If any factor is neglected, the quality and use of the field can be seriously impaired. While proper construction can greatly improve the playability of an athletic field, there is a limit to the amount of traffic that a field will endure, and this should be recognized by supervisors and users. Fields constructed using the recommendations contained within this bulletin should support a minimum of 40 to 50 football contests or 100 or more soccer contests per year without being excessively worn.
Base grading
Native soil fields high in silt and clay are not suitable for intensive use because they provide poor drainage and easily compact during use. Therefore, native soil will likely have to be excavated from the site. If topography permits, sand can be placed directly on the surface without excavation after level grading at a considerably reduced cost. If excavation is necessary, it should be performed so that the finished grade at time of planting conforms to the sidelines or track area. Optimum grading depth for high quality fields should be 16 inches [this depth will be replace with 4 inches of base material pitrun (naturally occurring deposits of sand and gravel) and then 12 inches of sand; drain tiles are typically trenched into the subsoil at the bottom of this grading depth. Bases should be graded flat, or have a crown of 6 inches from the center to the sidelines.
Although a 16-inch depth is optimum, it is possible to build a functional field with a 12 inches layer of sand and no fine gravel base; however, similar to the design described above, drain tiles should be set another 4 inches down into the subsoil. After drains, the drain lines are trenched and before the sand is installed, the drains should be covered with fine gravel or coarse sand material.
Installing base material
Base material here is defined as sand or pitrun placed over the drain lines and the graded sub-base. This material should drain rapidly to facilitate faster movement of water to all drain lines. If ample quantities of low cost sand are available, the entire profile could be made up of sand to the grass surface. Base materials can include pitrun with a maximum of 2-3% total silt and clay. Other materials may include pea gravel, coarse sand, with particles ranging from No. 8 to No. 3/8 screen. Never permit abrupt profile changes, especially fine sands or soil over coarse gravel. Saturated zones will occur at these interfaces. Try to maintain textural uniformity in the profile.
The depth of base material can vary from 4 to 12 inches. Carefully deposit base material over the field to avoid disruption of the base grades and to prevent damage to the drainage lines. During installation never run wheeled equipment across drainage lines. The base material can be brought to grade with light tack type equipment or light grading equipment. Under no circumstances should efforts be made to heavily compact the base material in any manner other than normal grading operations to bring the field to grade.
Subsurface drainage
Installation of drainage lines is necessary when water tables are too close to the surface and must be lowered. Drainage should also be installed when subsoils are impermeable or so slowly permeable that turfgrass rootzones remain saturated for extended periods. Subsoils that are moderately permeable (1/2 inch per hour or greater) do not require extensive drainage installation. A standard percolation test conducted at about 30 inches deep will help determine the need for drainage lines.
When drainage is necessary, adhere closely to the following procedures. Install drain lines on 15-foot centers ranged longitudinally on the football field. This spacing interval of drain lines will allow free movement of vehicles during the construction process and will facilitate rapid water movement into the drain lines.
Install drain lines 16 to 24 inches below the grassed surface at a 1 to 2% minimum grade. Drainage trenches should be 6 to 8 inches wide and should be dug with laser-controlled machines. This will insure the proper grade and depth of drain lines. Drainage trenches should be dug with a wheel ditcher with a cleaning shoe that leaves a “V” shaped, clean, and graded trench bottom. If other types of trenchers are used, the contractor should cut a level (flat) bottom and excavate 2 inches deeper than the required invert elevations and place (1/8 inch minus to 5/16 inch minus) pea gravel 2 inches deep, leveled to grade for placement of the drain lines. Drain lines can be placed longitudinally from end to end on naturally sloping terrain or crowned fields, but this is not practical on flat terrain. The herringbone method is a typical alternative to longitudinally oriented drain lines. Typically, the field should be divided from the center and trenched in each direction, reducing the length of run in half. Since a perimeter drain should be installed around the football field to facilitate drainage of both the field and the running track, these longitudinal drain lines can be coupled with the perimeter drain and discharged into storm sewers or other suitable sites. Some drainage lines are manufactured with slits 360° around the tubing and some are drilled with holes only on one side at 45° angles. In the latter case always place the holes downward. During installation, attempt to keep soil off the drain lines and trenches. Carefully cap blind ends and properly connect and tape all joints to prevent entrance of soil material or animals.
Drainage lines spaced on 15 feet centers should be installed with 3- or 4-inch semi-rigid drainage tubes with slits or drilled holes to facilitate inflow of water. After the drain lines are in place, backfill trenches with pea gravel (1/8 to 5/16 inch) or coarse sand to a depth of 2 to 4 inches over the top of the drain tubing to avoid migration of fine sand particles into the drain line causing clogging of the drains. Manufactured filter devices either wrapped around the tile or placed over the tile to prevent migration of the fine particles are not recommended. Cases have been reported where these filter materials have become clogged with fine particles and sealed the drain lines.
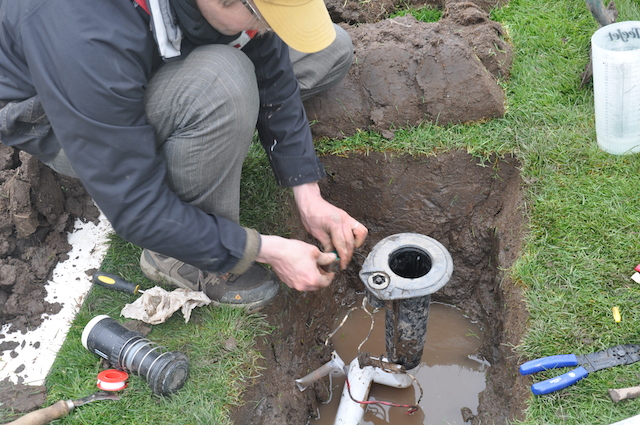
Extend drainage lines through the end zones to tie in with the perimeter drains near the running track. The drainage line surrounding the running track will intercept all field drains and should be 6 inches in diameter. Install catch basins around the perimeter of the field over the 6-inch drain at strategic locations for rapid evacuation of water from running tracks. Approximately 8,000 feet of drain lines will be required for fields of this design. It may be possible to also install irrigation lines in the drain line trenches. This should be discussed with an irrigation engineer.
Irrigation installation
Irrigation is essential on sand-based fields. Determine availability of adequate irrigation water throughout the year at an early stage while planning the installation of an athletic field. Irrigation systems should be designed and installed by competent irrigation specialists. Sand fields cannot achieve their maximum usefulness unless irrigation systems are installed to maintain proper moisture relations during rainfall deficits. Automatically controlled irrigation systems with safety pop-up heads are the most desirable for sand-based athletic fields. Irrigation water can be more carefully controlled from this type of system. Install irrigation heads at a grade somewhat higher than the finished surface; after the soil has settled and the grass has become well established, these heads can be lowered to their proper final height.
Sand selection
Ideally, the majority of the sand particles should fall between the ranges of No. 16 and No. 60 screen; however, sands with most of the particles between a No. 60 and 140 screen may be used for the rooting medium. With the latter, many precautions have to be followed in management to avoid slow infiltration of water caused by the accumulation of organic material and surface compaction. Always specify sand by sieve size. Most sand suppliers use Tyler Standard Screens that classify sand particles by the number of meshes per inch.
Surface sand depth will vary from 4 to 12 inches depending upon the quality of the base material. Pitrun materials with high proportions of properly sized sand and will allow the use of perhaps as little as 4 inches of finest quality sand for the surface.
The addition of organic material, mixed off-site into the surface sand medium is optimal. Materials such as well-composted organic matter or fibrous sphagnum peat moss are acceptable for the organic matter amendment. Organic matter particle sizes should range from 1/8 to 3/16 inch. Avoid all materials that are coarser or finer than those indicated. Under no circumstances should decomposed peat material be used as an organic amendment on high traffic sports fields. Organic materials increase water and nutrient holding capacity and give resiliency to the surface for the first 2 to 3 years. After approximately 2 years, however, the grass plants will produce adequate organic matter. With adequate attention to fertilization programs, organic amendments can be omitted.
If organic materials are included with the sand topmix, do the premixing off-site with bucket loaders or other mixing equipment to get a homogeneous mixture of sand and organic matter; then place the mix over the playing surface. Incorporate no more than 20% organic material by a loose volume with the surface mixture. It is best to have samples of both the sand and organic material sent to a qualified soil testing lab to ensure the best sand and organic material combination that will give the optimum water holding capacity and drainage for the field. Each batch of rootzone mix should be tested before it is placed on the athletic field.
Bring the surfacing or rooting medium to a flat grade over the playing surface and moisten to permit easier grading and movement without severe rutting. Fields built to these specifications do not need to be crowned because of the porous rootzone medium and installed drain lines. Practice care and caution to avoid damage to installed sprinklers and drains. Do not use compaction devices on the surface material except for normal grading and tillage equipment.
Turfgrass establishment
Nutrient applications should be based on soil tests; however, as a quick guide incorporate the following fertilizer elements into the sand profile before establishment at the indicated rates:
- Dolomitic limestone (supplying calcium and magnesium): 100 pounds per 1000 square feet.
- Phosphorus (P): 4 pounds P2O5 phosphate per 1000 square feet.
- Potassium (K): 5 pounds K2O per 1000 square feet.
- Micronutrients: Apply a blend containing iron (Fe), manganese (Mg), molybdenum (Mo), copper (Cu), zinc (Zn) and boron (B) according to manufacturer’s recommendations or seek competent advice. Application rates will depend on the concentration of the formulation.
- Nitrogen (N): Apply 2 pounds of available nitrogen per 1000 square feet from slowly soluble or slow release sources of nitrogen. Sulfur-coated urea, IBDU, urea formaldehyde, Polyon or an equivalent PCSCU coating are all examples of slow release nitrogen sources.
Do not apply fertilizer materials until the field is brought to its final grade. Lightly rototill all fertilizing materials and soil amendments into the surface 4 inches of the final mix. After the fertilizer materials have been incorporated, no surface sand movement should be allowed. Movement will displace the fertilizers, causing streaks and windrows of materials with areas of total deficiency. Following the incorporation of fertilizers, slightly moisten the field and roll with a light roller or with a Brillion drill or suitable lightweight packing devices to slightly firm the surface before seeding.
Planting
Use a Brillion drill or comparable landscape seeder for planting. This type of drill uniformly spreads the seed and presses it into close contact with the soil surface. Divide the seed in half and sow in opposite directions. This will result insure fewer skips in the planting. In areas of considerable wind movement, hydroseeding with grass seed and approximately 1200 pounds of fiber mulch per acre have been most successful in preventing the blowout of seed and sand. Another advantage of hydroseeding is that additional starter fertilizer can be added to the hydroseeder’s tank mixture and applied at the time of seeding. Broadcast methods of planting are less desirable than the methods mentioned.
After planting with a Brillion drill, no subsequent rolling is necessary. The addition of organic mulches to the surface is not necessary if automatic irrigation is available. Plantings can be made anytime during the normal growing season in the Pacific Northwest. The ideal time is late summer or mid-spring. After the seed has germinated, or immediately before, apply a quick release nitrogen source, such as urea ammonium nitrate or ammonium sulfate, at the rate of 1 pounds of product per 1000 square feet to provide soluble nitrogen for the emerging seedlings.
After the seed has been planted, it is important that the surface be kept continuously moist. This is one of the most important steps in establishing an athletic field. Exercise extreme care not to overwater the field, since nutrient leaching will occur. Apply frequent small amounts of water until germination and seedling emergence is complete; these applications must be made frequently (i.e. 6 to 8 times per 24 hours) throughout the 24-hour period to insure surface dampness at all times. Uneven germination and possibly lack of germination will occur if the surface dries.
After germination and seedling emergence is complete (usually within 7 to 14 days), decrease irrigation frequency (i.e. 1 to 2 times per 24 hours) and increase the amount of water applied according to rootzone needs. Allow some surface drying between irrigations. Although sands will drain rapidly, excessive water will cause nutrient leaching. After the turfgrasses have been mowed the first time, it is possible that one or two proper waterings per week will be adequate. Employ a soil probe to determine soil moisture. Do not guess; check the soil. When grasses have removed approximately 50% of the available soil moisture, it is time to irrigate.
It is important during the establishment period to provide balanced nutrition, including adequate sulfur.
This bulletin was authored by: Alec Kowalewski, turfgrass specialist at Oregon State; Gwen Stahnke, turfgrass instructor, Walla Walla Community College; Tom Cook, retired turfgrass specialist for Oregon State; and Roy Goss, extension agronomist (retired), Washington State University.